Adaptive Ski School Takeaways
My older brother, John, has cerebral palsy. He participated in adaptive programs through his teen years. Mostly horseback riding and swimming, but he also skied using a walker and eventually Snow'Kart.
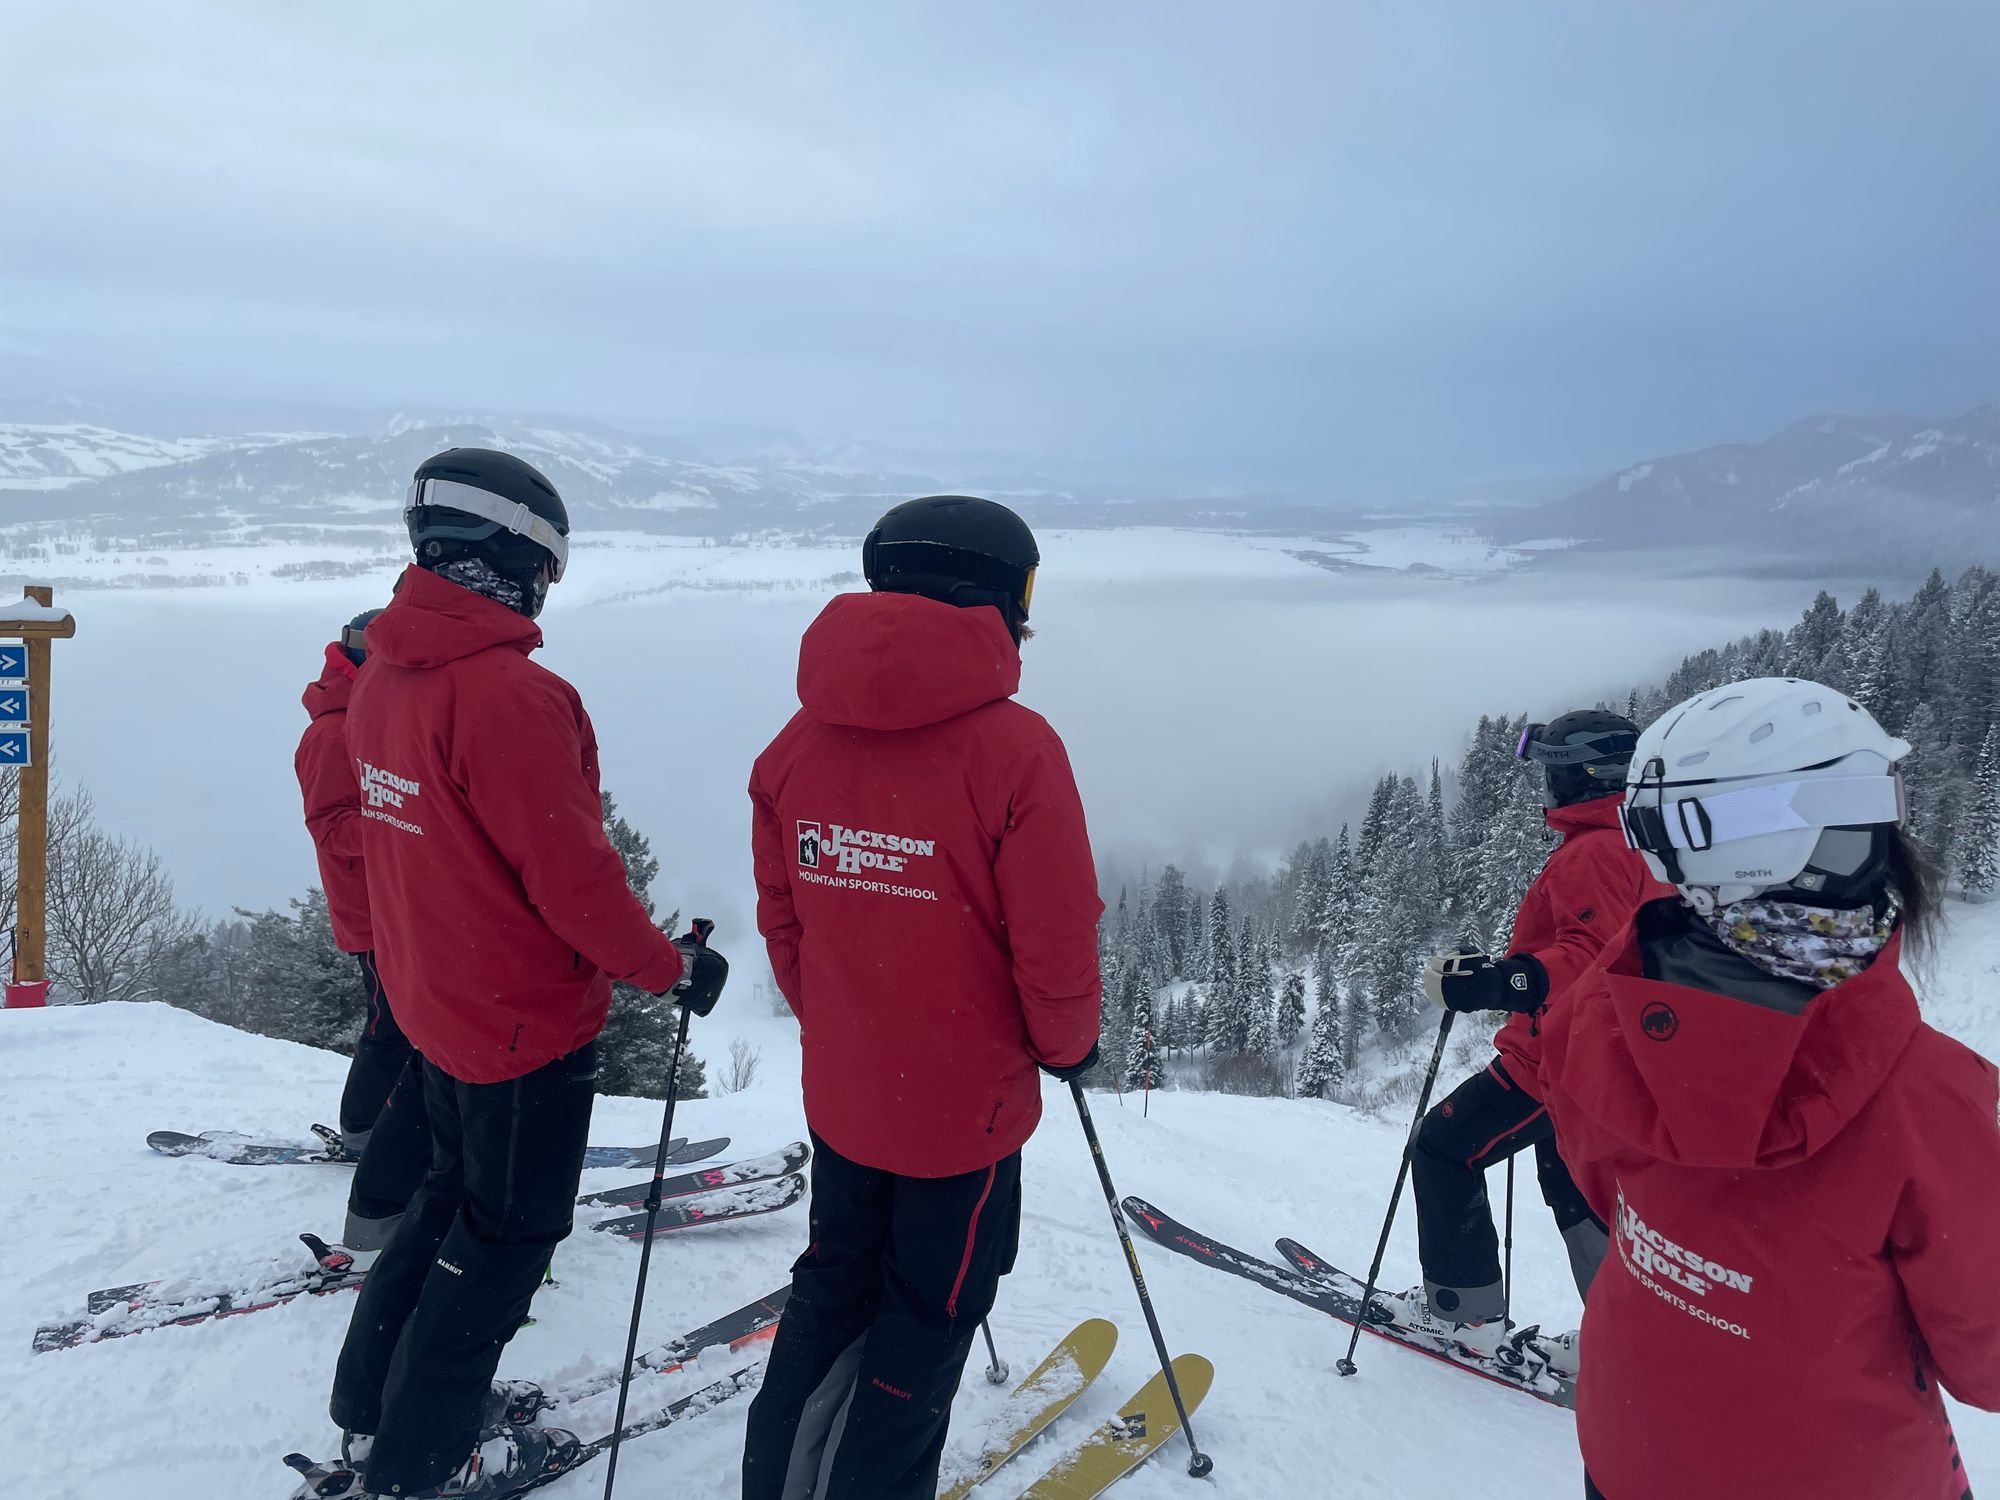
I've wanted to help with an adaptive program, so I signed up to teach part-time through Jackson Hole's adaptive ski school this winter (2022-23).
Disclaimer: I'm a total rookie to adaptive skiing. I figured I'd share my takeaways from training / teaching, on the off-chance any are helpful to potential adaptive athletes or instructors.
My Teaching Goals
My first priority was enabling a fun (and safe) day on the slopes. By contrast, I found the regular PSIA (Professional Ski Instructors of America) curriculum emphasized technical skills – angulation / inclination, edging, upper / lower-body separation, etc.
Not to say there isn't overlap. On the non-adaptive side, boring or overly-technical instruction is unlikely to prompt a second lesson. And many clients are first-and-foremost booking a local tour guide / pass to skip lift lines.
Likewise, some of my adaptive students are hyper-focused on technique. E.g., sit-skiers progressing from greens to double-blues, or two-trackers improving technique on black runs. (See definitions below.)
But in general, adaptive ski school – at least from my rookie perspective – is more focused on troubleshooting equipment to fit a student's adaptive needs, enabling access via lifts and managing hazards on the slopes.
Adaptive equipment can be a blast to use. During training, we first experimented with sit-skis, Snow'Karts, walkers, sticky, etc. (More on equipment below.)
Sit-skis in particular are tough to master and exhilarating once you get a feel.
Alpine Equipment
Adaptive equipment varies and can be modified for adaptive needs. Sometimes the best solution involves mixing and matching. At the risk of over-simplifying, I'll split equipment between standing and sitting.
Standing
Terms
For standing equipment, "track" refers to the number of contact points with the slope. "Two-track" = two skis; "three-track" = one ski and two outriggers; and "four-track" = two skis and two outriggers.
A ski "outrigger" is a pole (usually metal) with a short, ski blade (usually plastic) on the end. The outrigger slides over the snow, but helps with fore / aft and lateral balance. Outriggers feature a handle perpendicular to the shaft, plus velcro straps that secure to forearms.
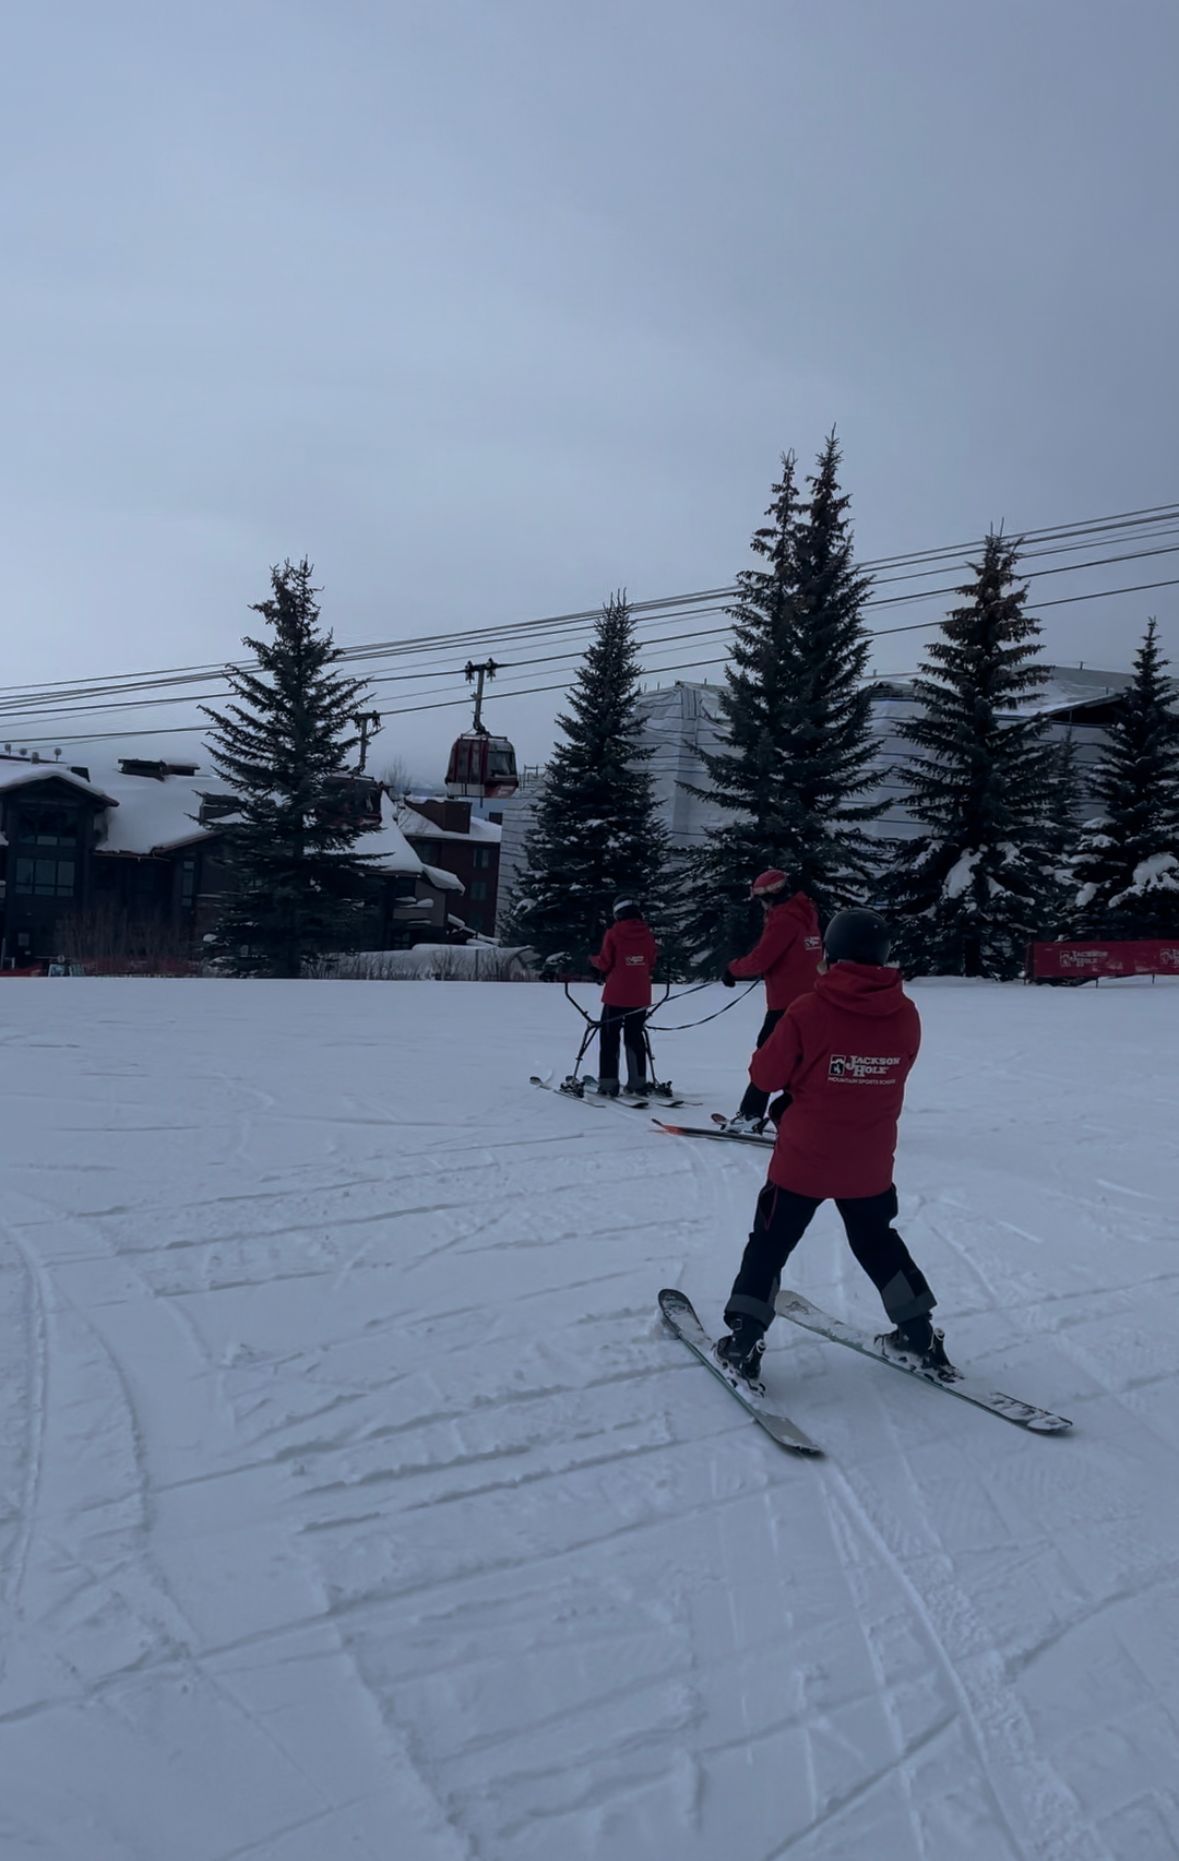
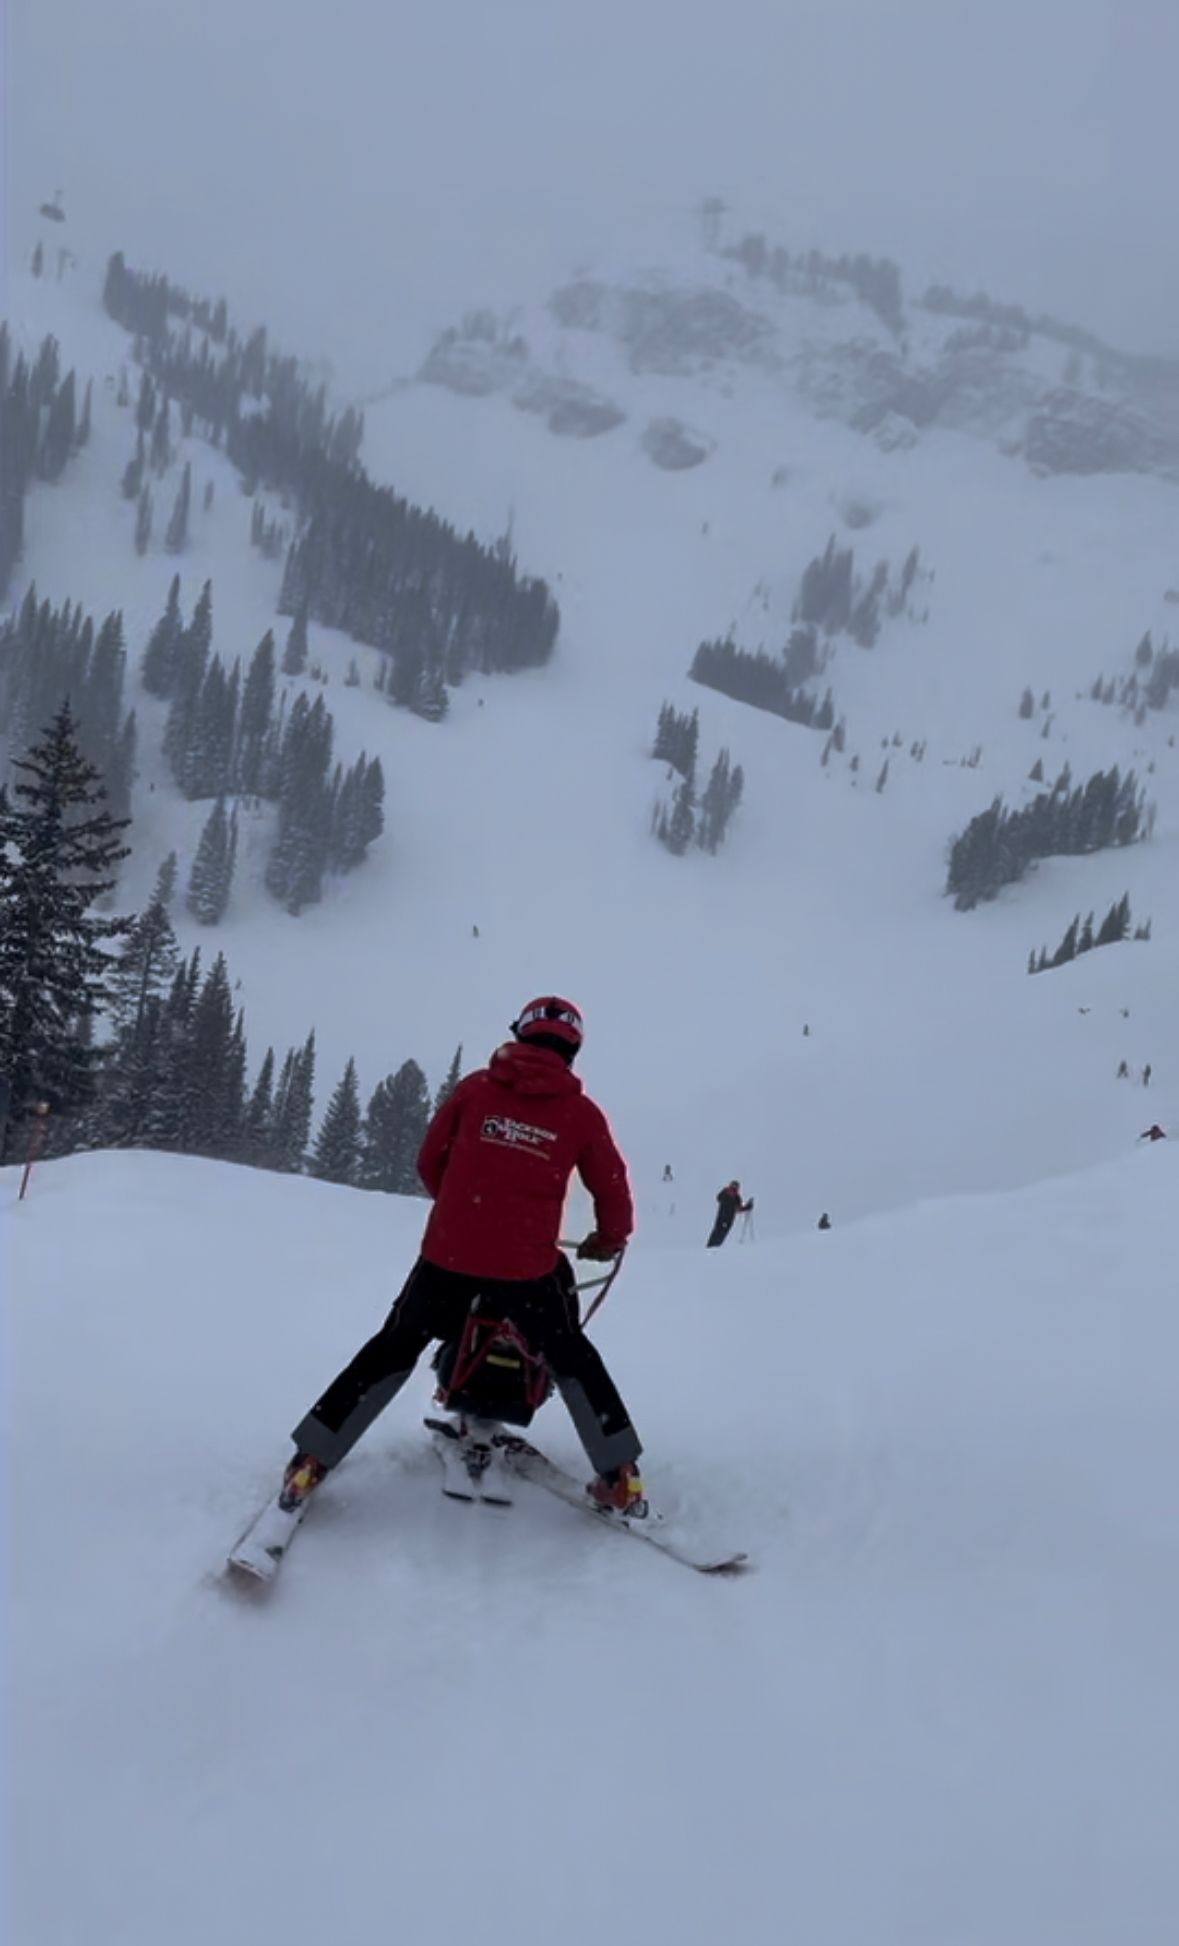
"Tethering" refers to instructor speed / steering control via straps. One end of the strap is attached to the rear / sides of equipment (e.g., slider below) and the other to the instructor's wrist.
Two-track
In my experience, two-track skiers generally had mental or emotional needs requiring additional assistance or mild physical imbalances. Sometimes two-track skiers need equipment like wedgies or a hula hoop, but not quite outriggers.
Examples from this season included down syndrome, autism, mild cerebral palsy and rare genetic disorders.
Visually impaired skiers also two-track with instructor guidance like verbal cues. We practiced "blind" skiing during training with an instructor providing verbal guidance – left, right, hold, slow, stop, etc.
Two-tracking
Three-track
While I didn't ski with any three-trackers, one of my sit-ski clients is a former three-track skier. Three-tracking takes a toll on the knee. With only one leg doing the work, ligaments and tendons take a beating. So as a single amputee, he switched to sit skiing this season.
Wear and tear notwithstanding, plenty of three-track skiers are tackling big feats, including massive ski mountaineering ascents / descents.
Four-track
Two-track athletes who need additional support via outriggers, but short of a slider (below). Outriggers contact the snow just in front of the skier.
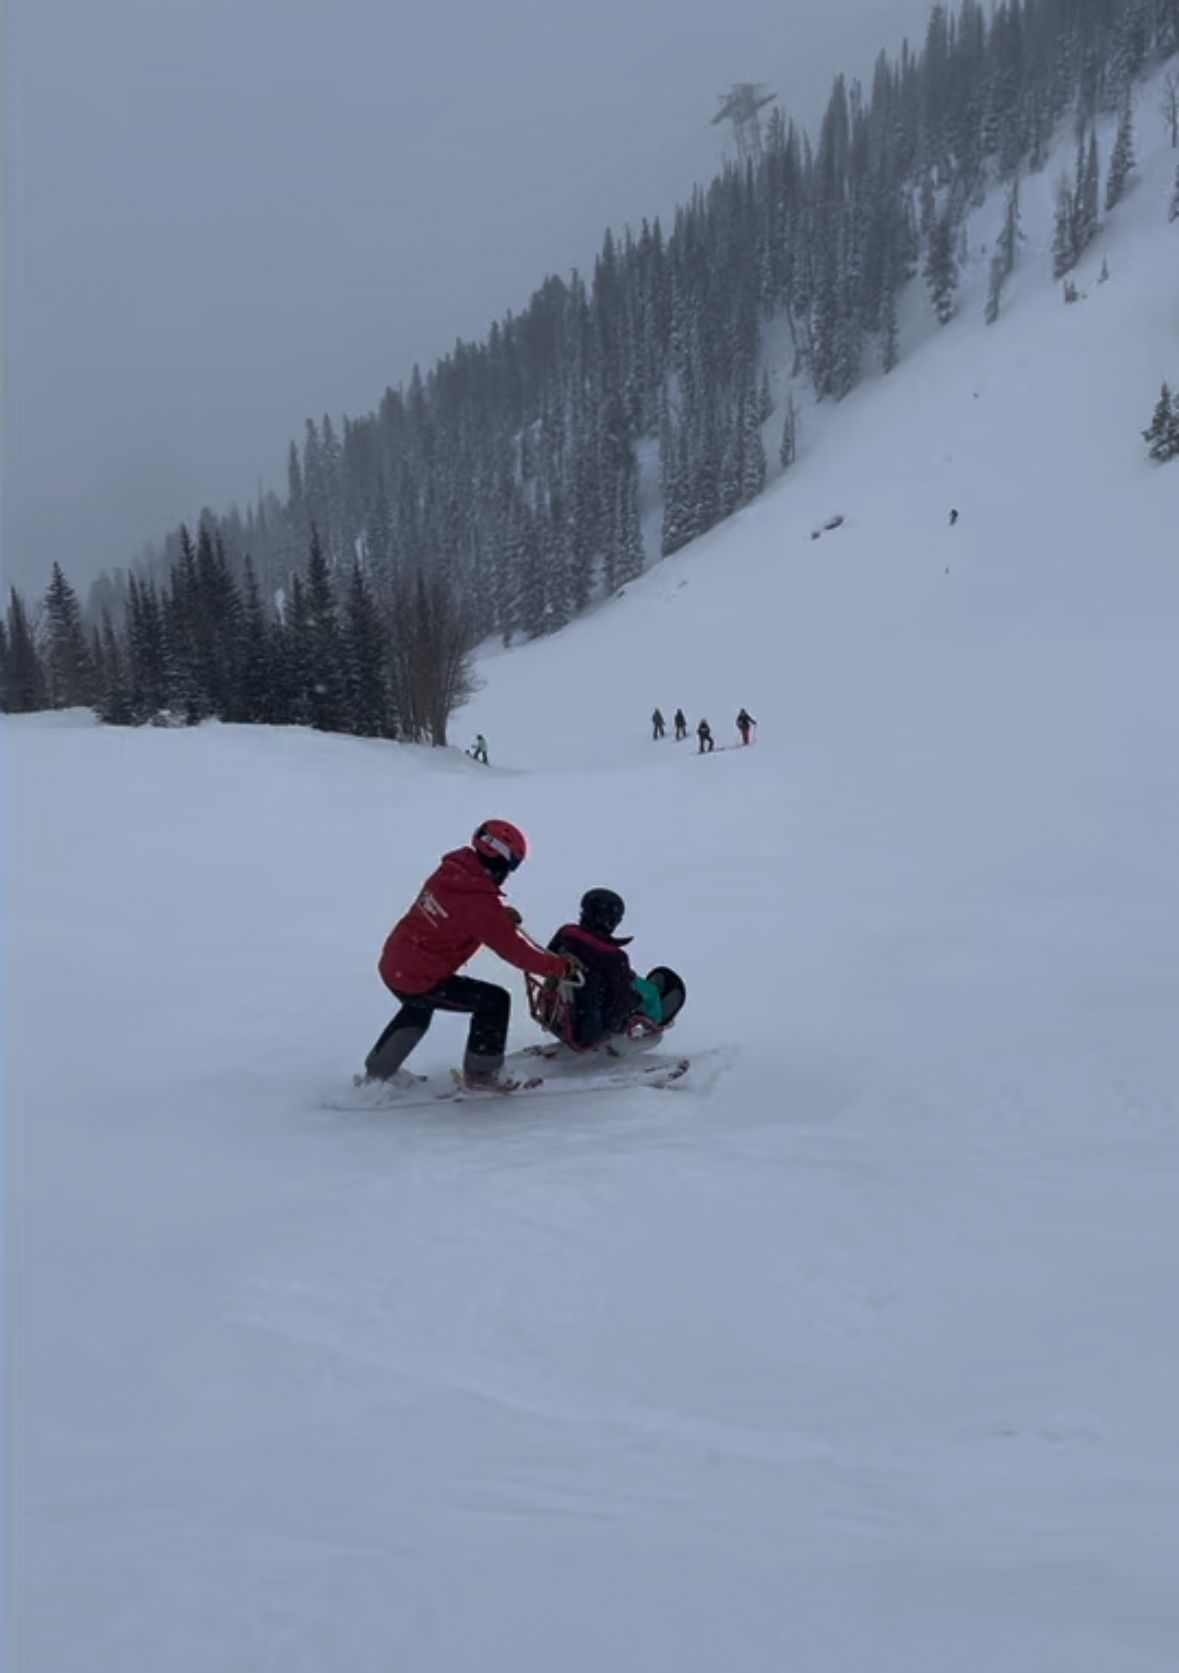
Slider
Skiers requiring more support can use a slider. It's essentially a walker with two forearm rests for the skier and two outside handles for instructors. The device locks into two skis, one on each side of the skier for balance. An instructor tethers the slider from behind to steer / control speed.
Sliders have a high center of gravity, limiting them to green runs – maybe a mild blue. When loading chairlifts, the slider sits on the group's legs and tilts back, so the safety bar can drop. I typically asked lift operators for a slow-down.
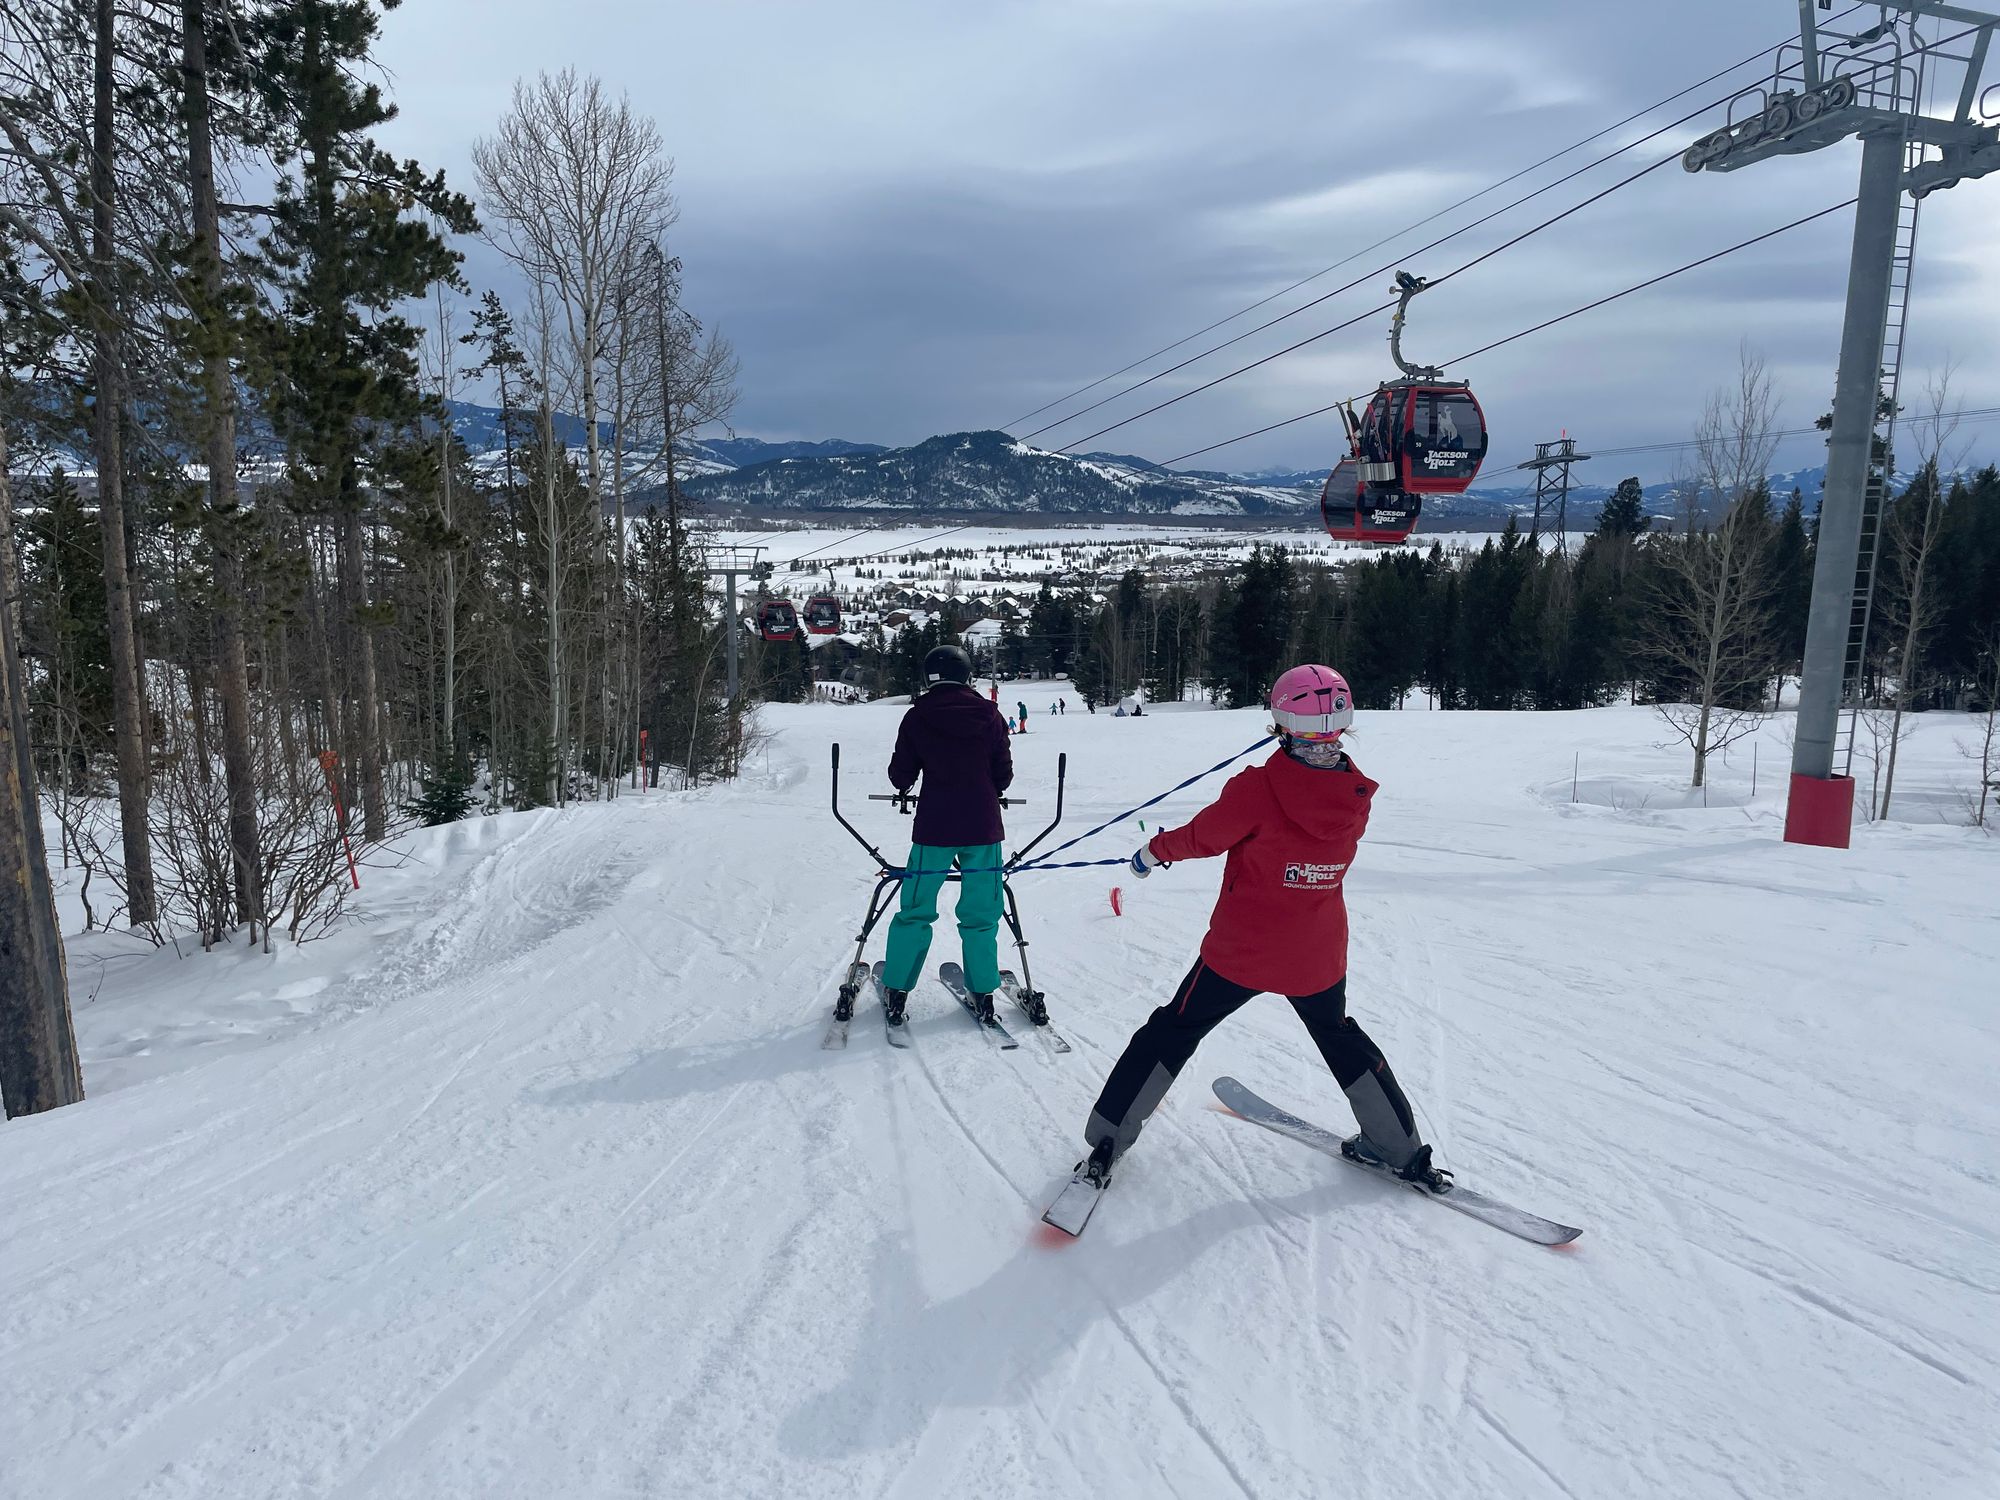
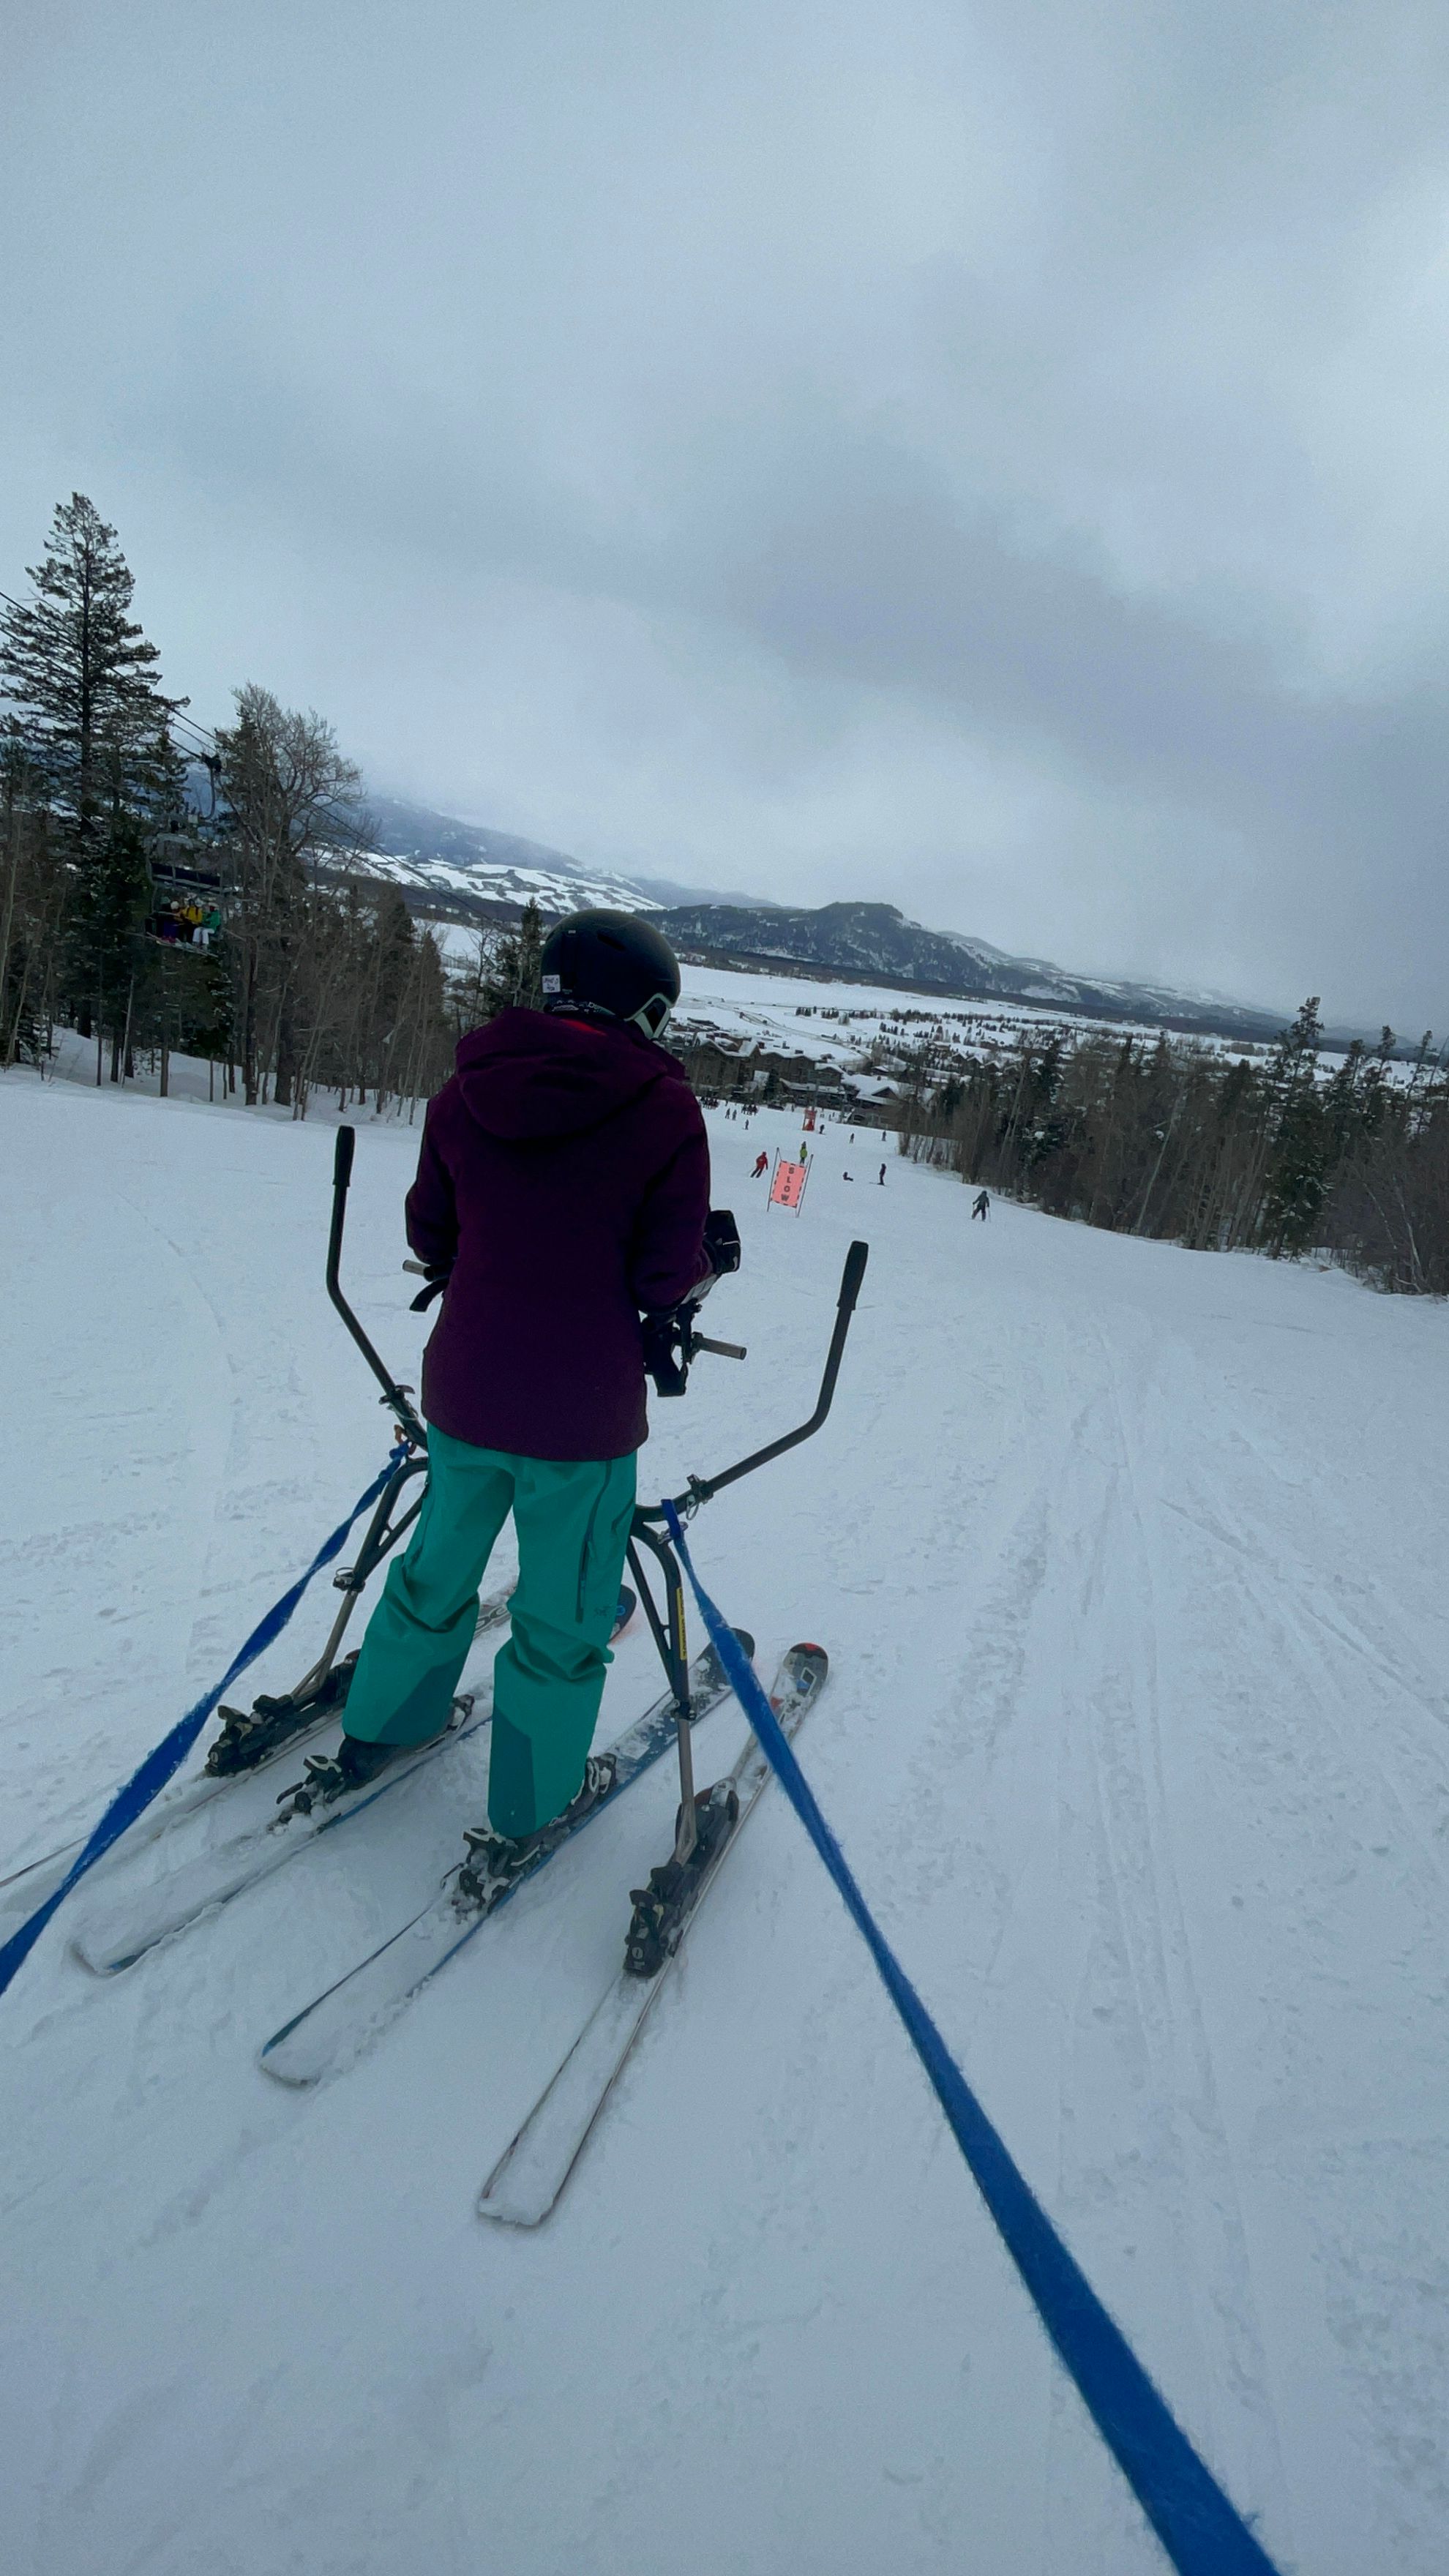
Tethering during training (left) and lessons (middle / right)
Sticky
Similar to a slider, but instead of support from two skis, the skier is supported by two instructors. An instructor holds each side of a long pole that the skier uses for balance. Using the sticky requires decent muscle control / balance by the skier and two well-coordinated instructors.
Sitting
For skiers who don't have the ability to ski standing or who want a less taxing experience on joints, there's seated ski equipment.
Terms
"Bucketing" involves speed / steering control via a handle on the back of the seated equipment. (The seat is referred to as a bucket.)
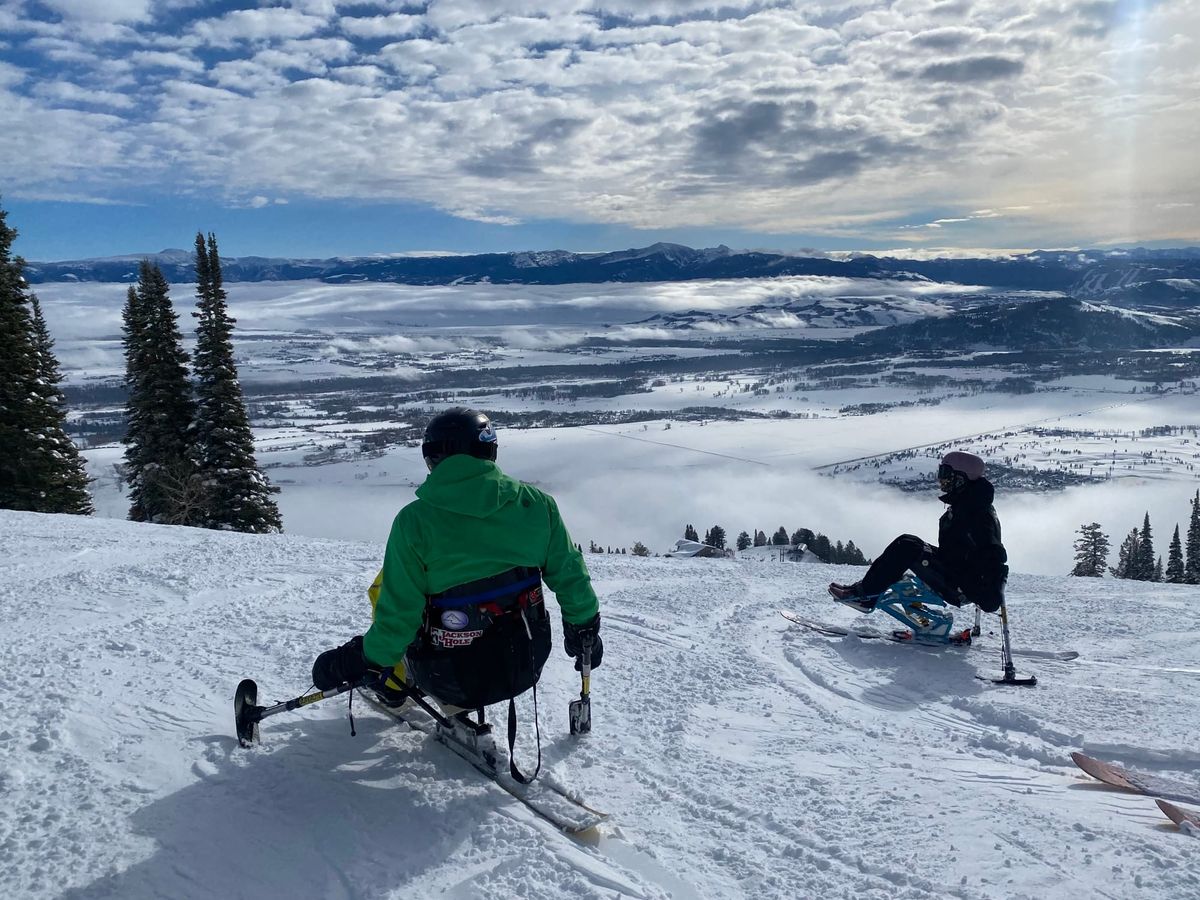
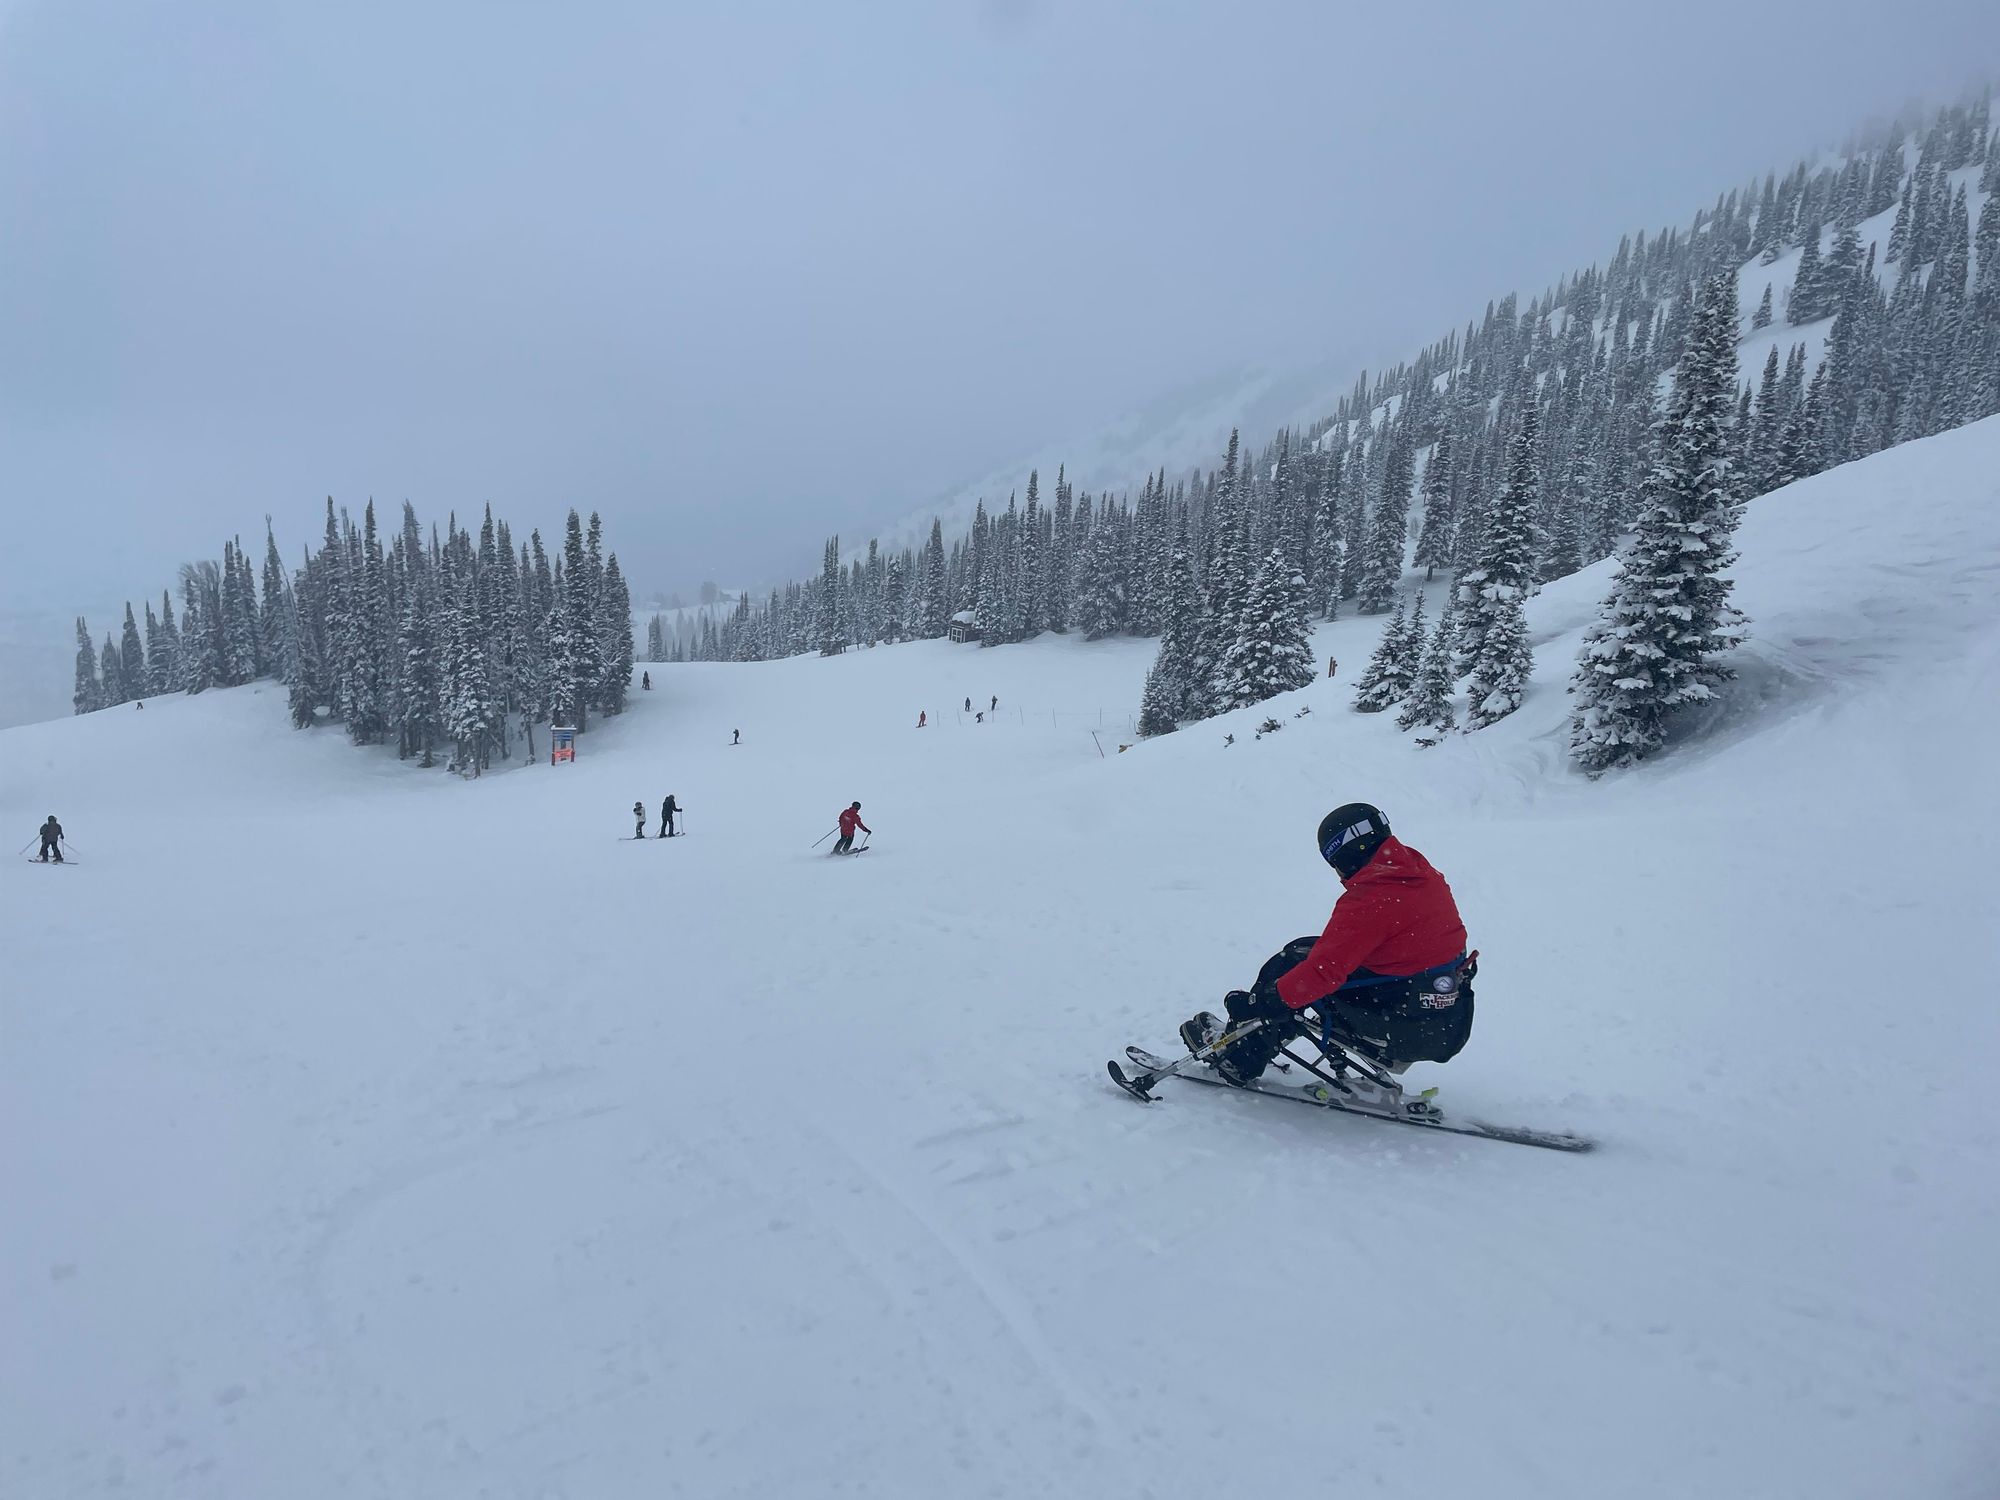
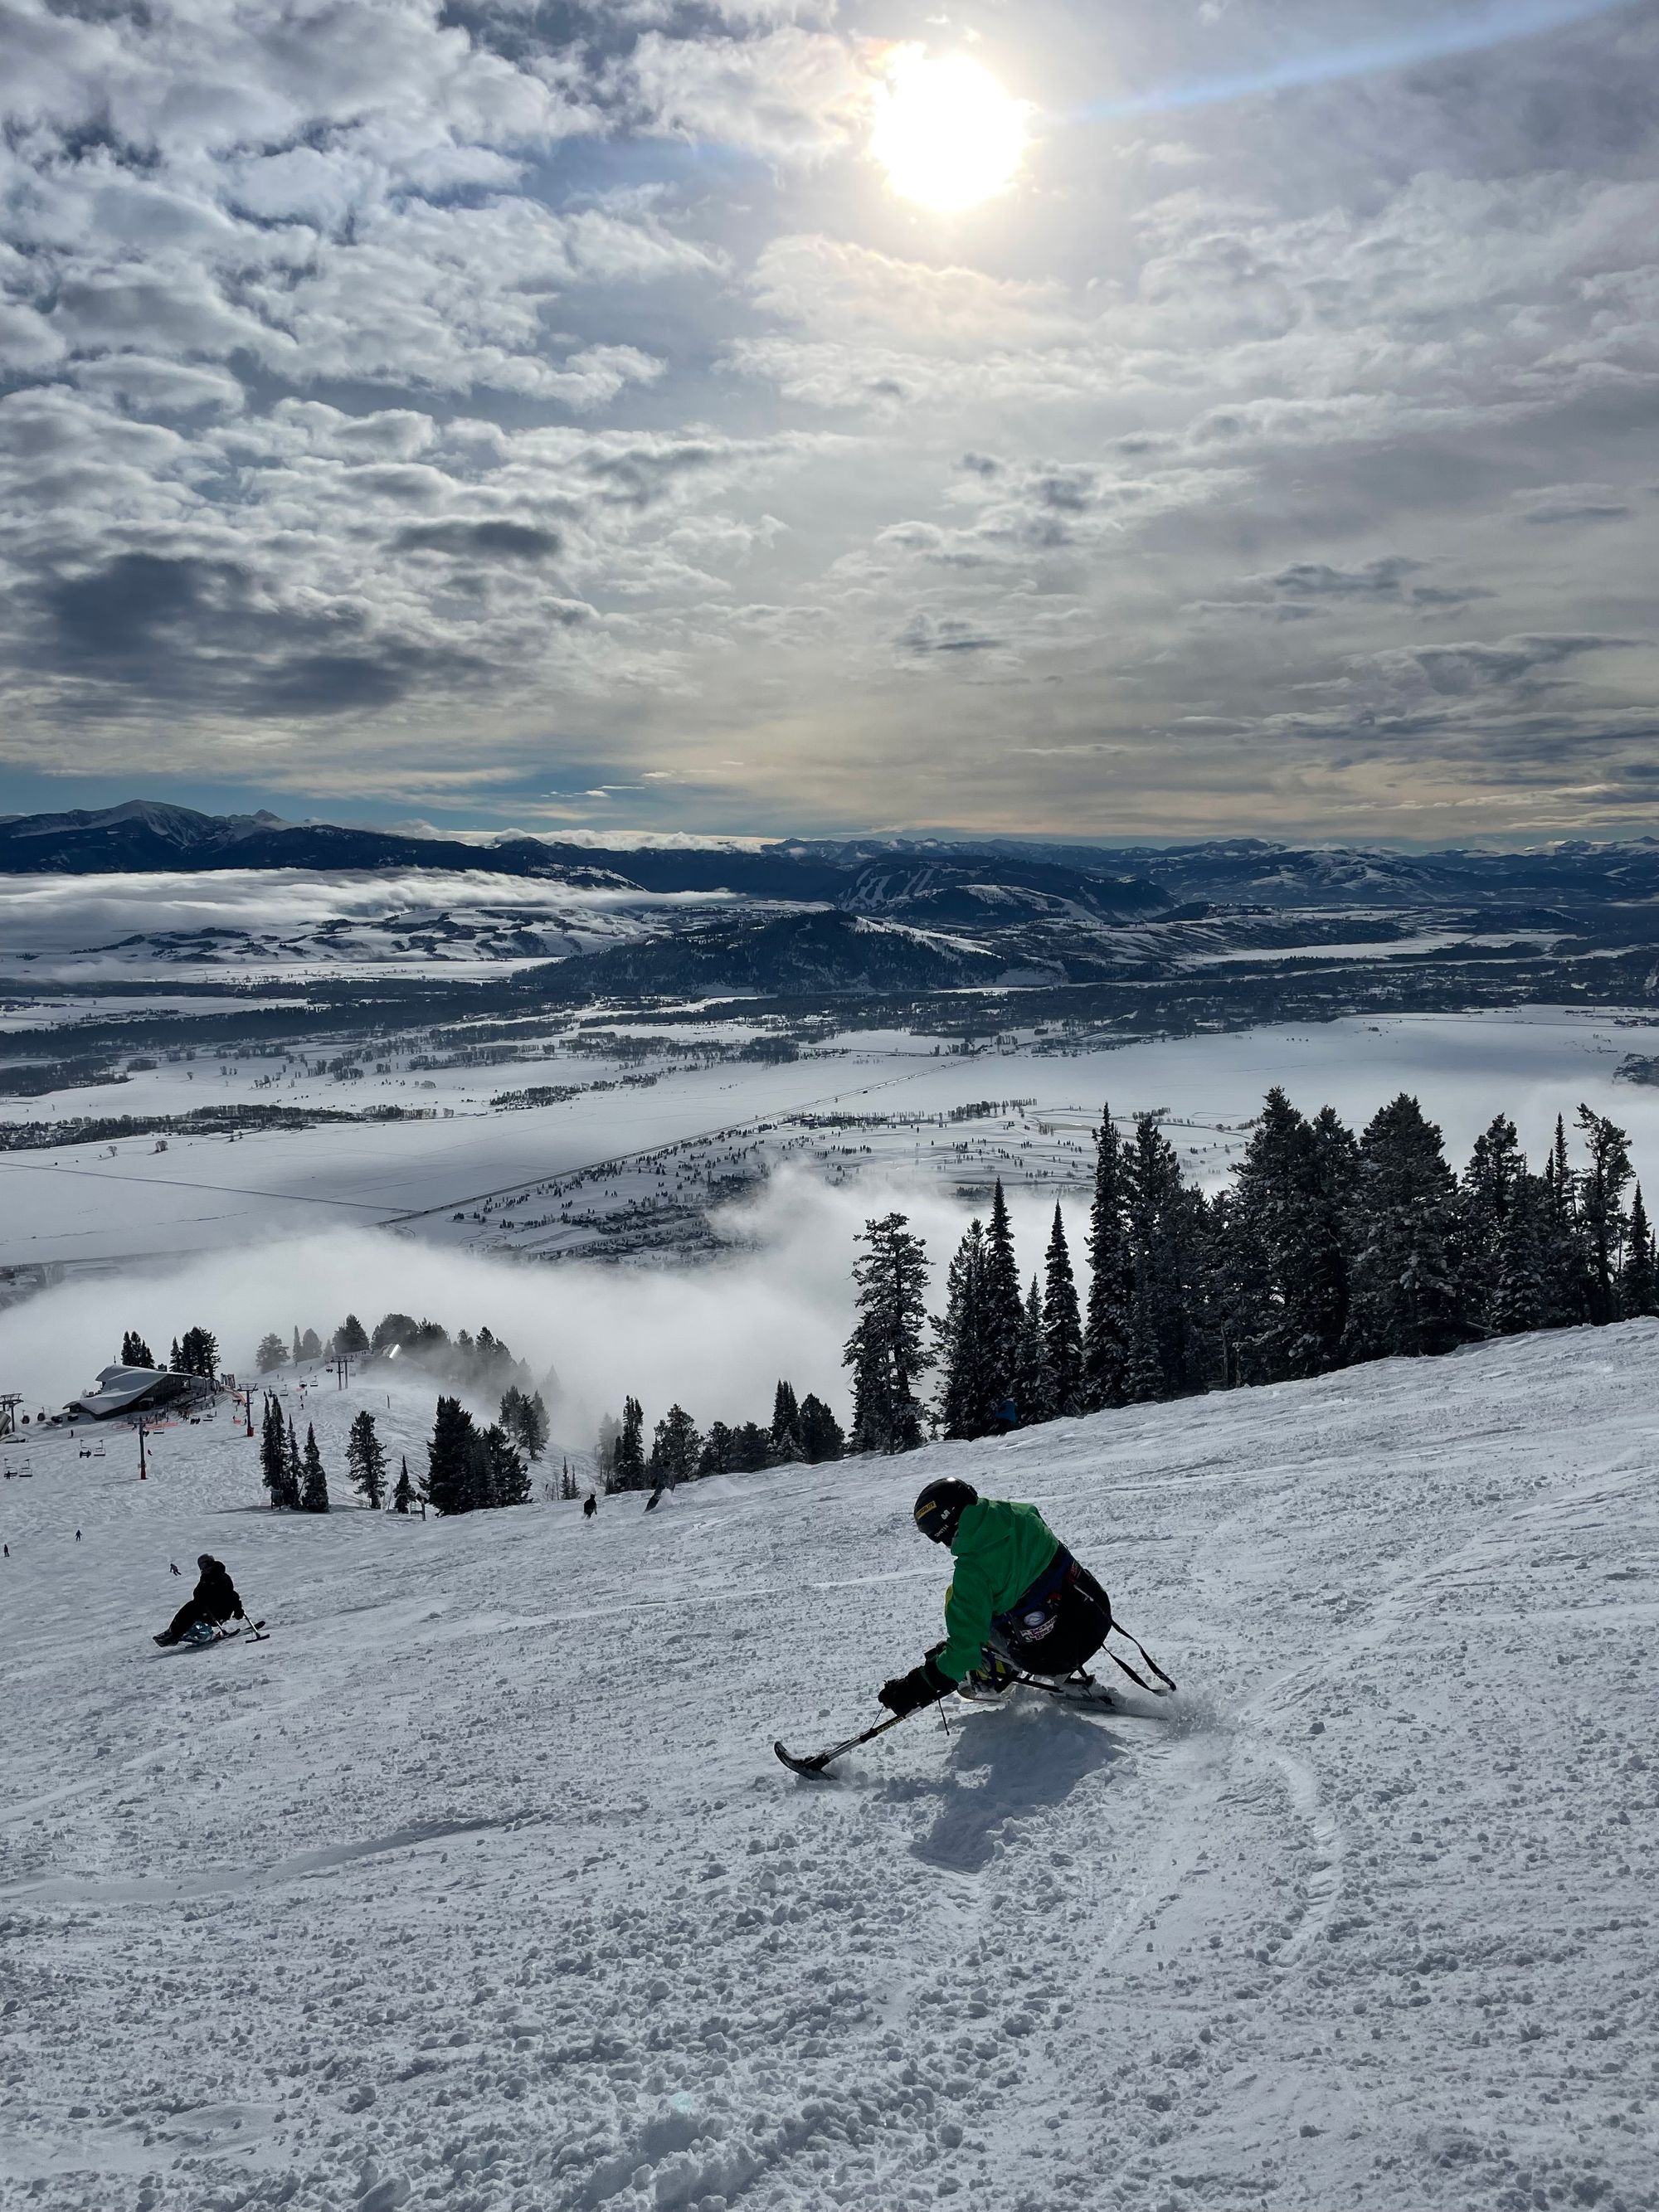
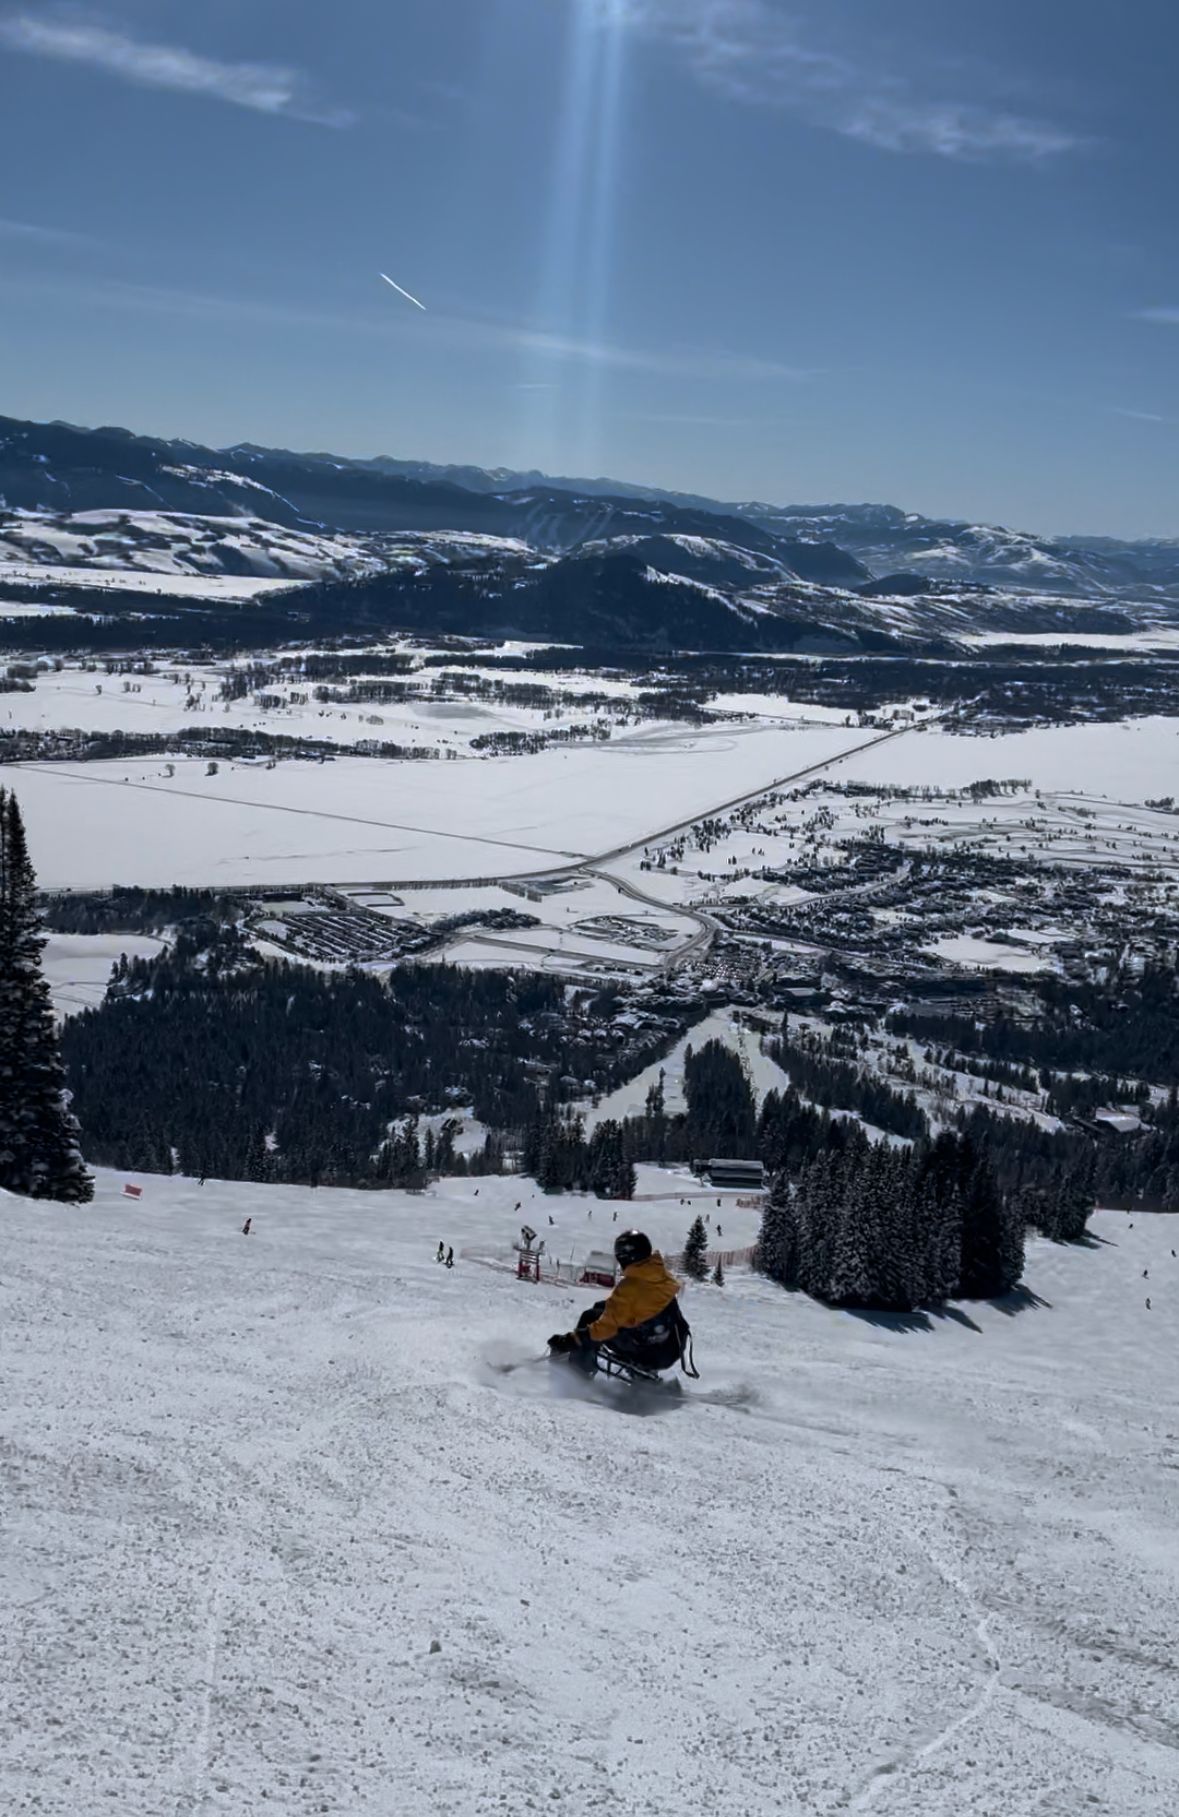
Sit-ski (mono)
Mono sit-skiing – a single ski centered beneath the seat or bucket – is the most challenging form of seated skiing. Mono sit-skiers use handheld outriggers to balance while skiing and to traverse flat snow (e.g., chairlift line).
Sit-skiers often start with longer outriggers, then progress to shorter. Most sit-ski technique lies in small upper-body movements. As a sit-skier becomes better at finding center balance, they can rely less on outriggers.
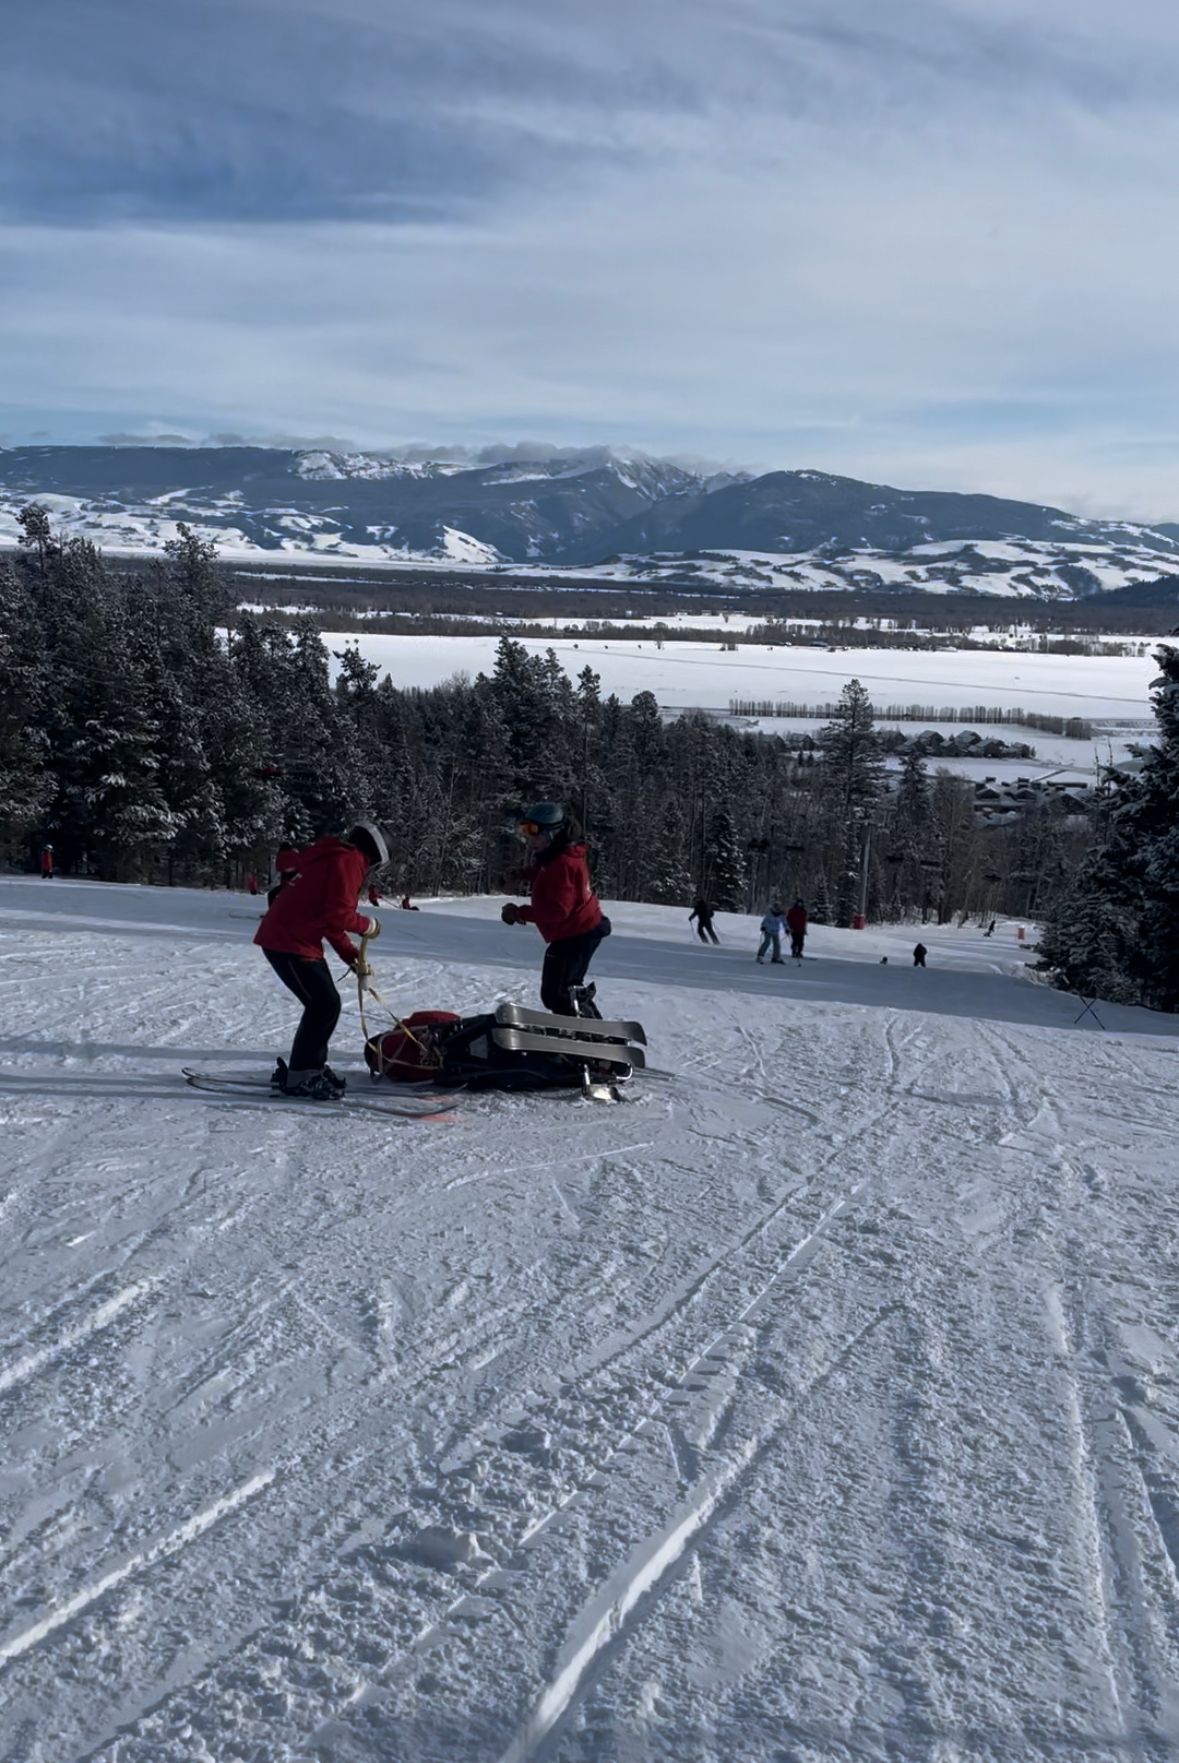
Sit-skis have shocks to absorb terrain and enable chairlift loading. When skiing, the bucket is locked to the ski with limited extension to dampen the ride. When loading, that lock is released and the bucket can separate from the ski like an arm extending. On lifts, the chair slides beneath the bucket with the ski hanging beneath, connected by that extended arm. When loading, we always use the safety bar and usually a safety strap clipped to the back of the chair.
Sometimes the lift fit isn't perfect. Some chairs lean forward, some load low to the ground, others have extra child-guards on the safety bar.
When first learning, we often request "full stops" of the chairlift. The instructor lifts from the back handle as the skier pushes up with outriggers. (Always check that the load mechanism is engaged before getting in line.)
Slow-down or full-speed reduces the amount of time the bucket needs to be lifted, making it less strenuous. Ultimately, the goal is to get sit-skiers to load solo at full speed – if able. The most reliable solo approach seemed to be loading on the side, using the chair's hand-rest for support. It also helps to have another skier sitting on the far side to balance the chair.
Unloading is typically done at full speed – just like riding a bike, it's easier to balance with some momentum than at a standstill.
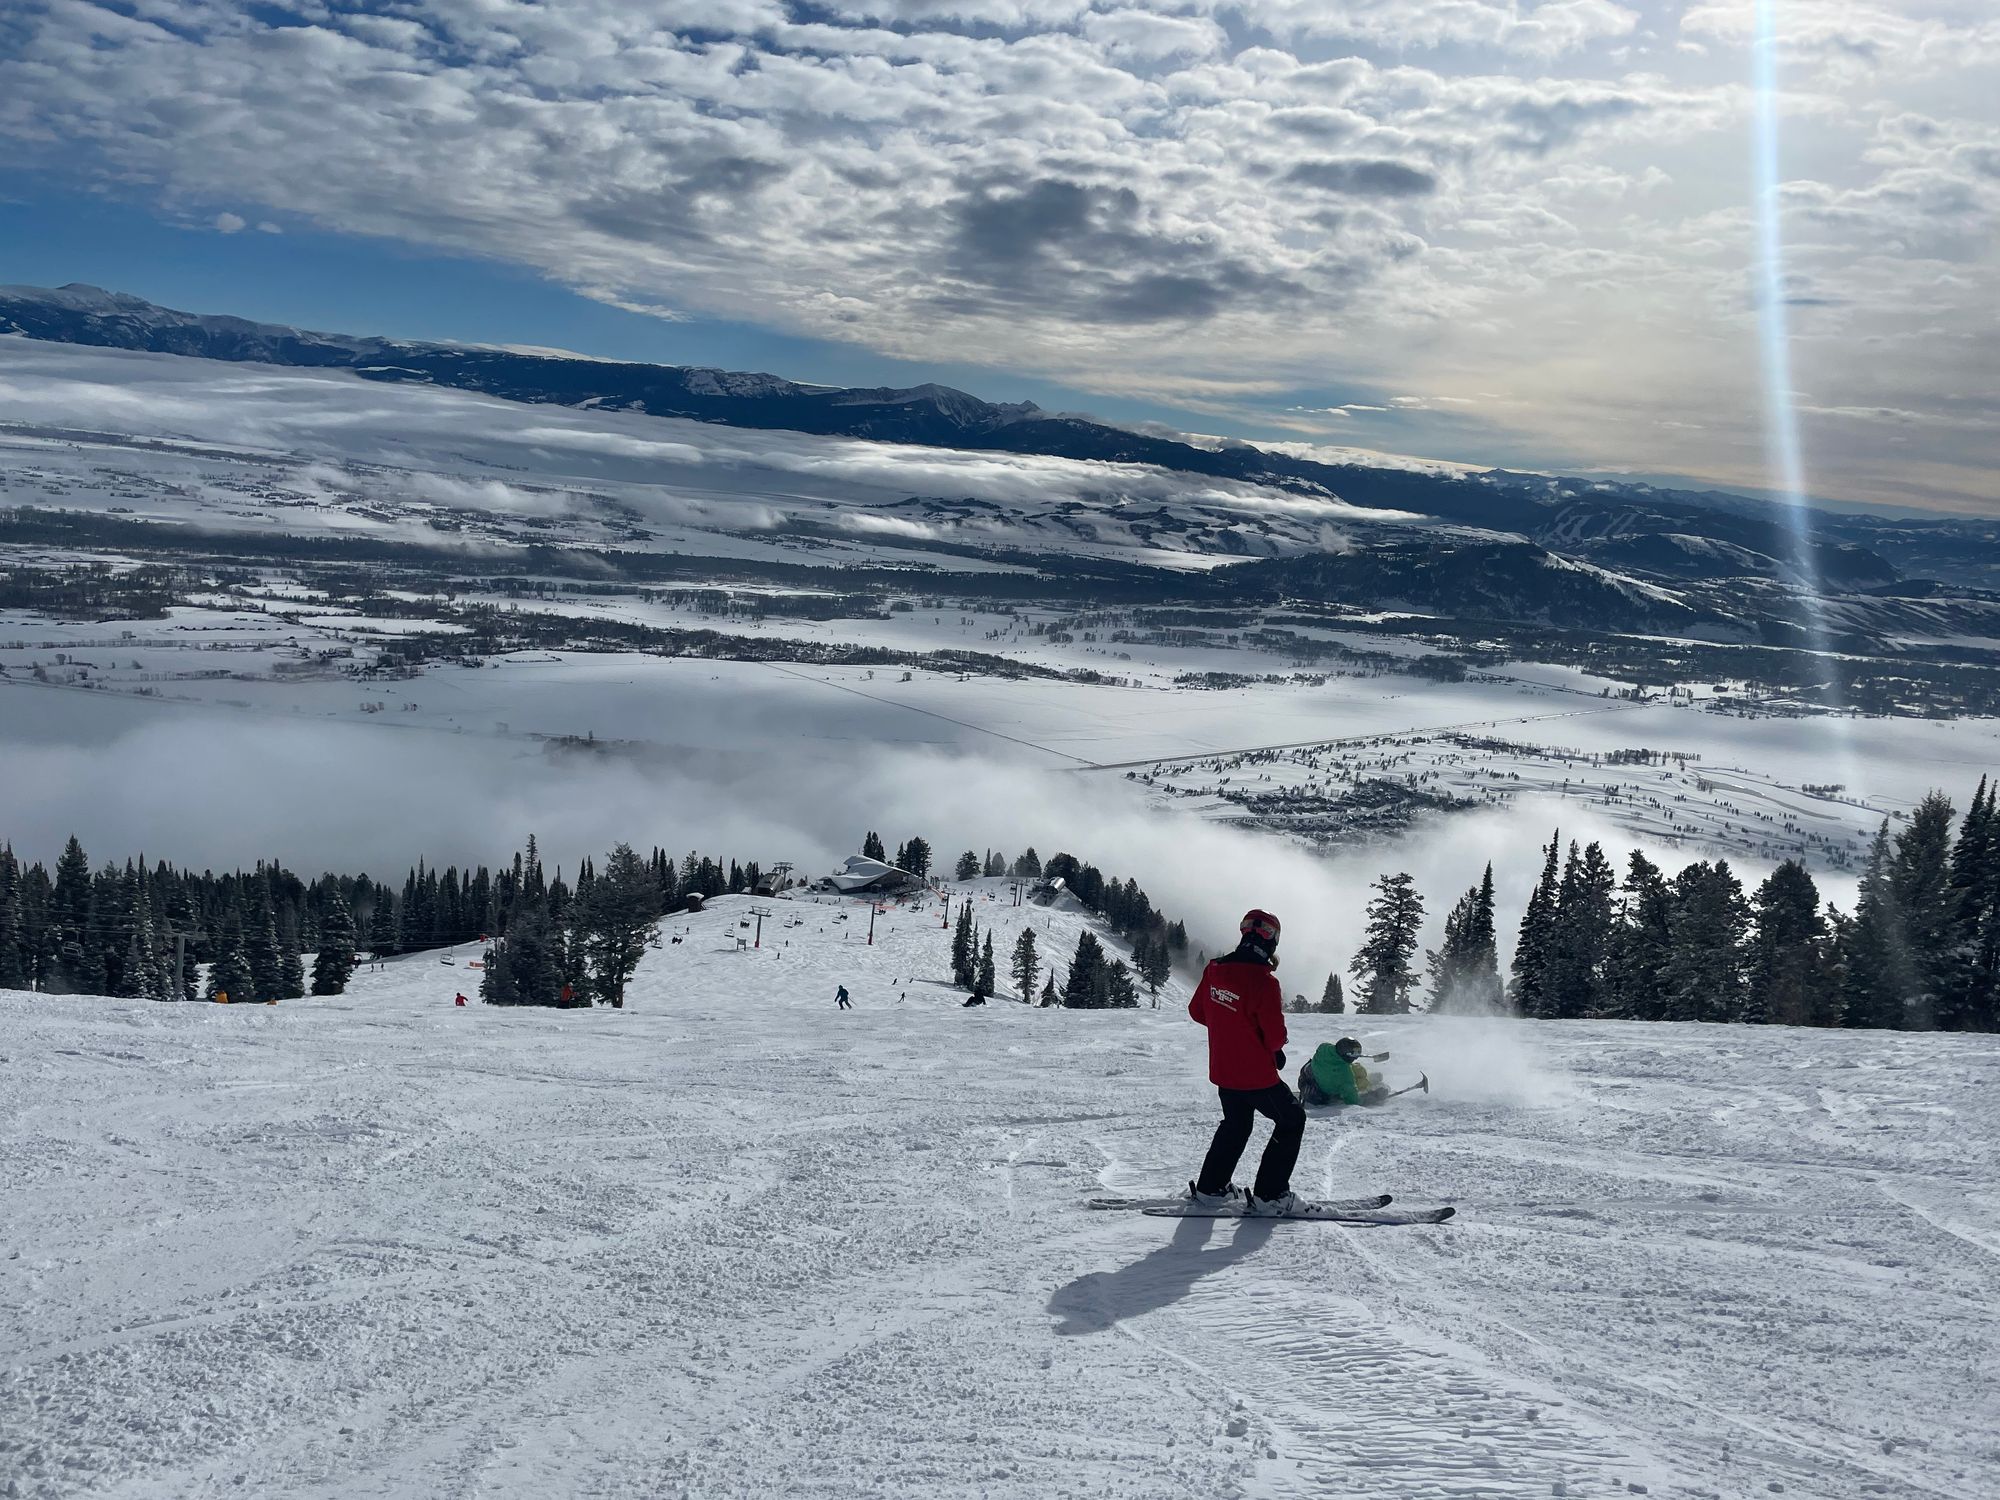
I've taken a number of falls loading and unloading. I've ended up in the gully when loading due to a late stop / stuck lock. I've had to pick up fallen sit-skiers who lost balance when unloading. I've even ended up beneath the chair when unloading due to a premature forward swing by the sit-skier. It's inevitable in the learning process. Loading and unloading is one of the trickiest pieces of the puzzle.
Some of the best sit-skiers compete in slalom, ski freestyle – even double backflips – and ski all mountain.
Mono-ski lessons
Sit-ski (bi)
When learning, sit-skiers often start on a bi-ski. Two skis are more stable and easier to maneuver. Bi-skis are also easier for the instructor to control via tethering and bucketing. I bucketed a couple skiers down blue slopes using a bi-ski. (Epilepsy and cerebral palsy.)
Fixed outriggers can be attached to the base of the bucket for additional balance, especially useful when tethering. During training, we started with a bi-ski and fixed outriggers.
When a sit-skier falls, the sit-ski needs to be re-positioned perpendicular to the fall line. Then the instructor stands on the ski and lifts the bucket, usually with help from the sit-skier, who pushes up with outriggers or hands.
Bi-ski tethering (left) and bucketing (middle / right)
Snow'Kart
For skiers who need more support, the Snow'Kart provides a very stable platform for use on green runs. Two skis are attached to the base of the bucket, but on the outsides pointed inward for stability and speed control (e.g., snowplow or pizza). The skier can turn left / right and slow down using handles.
The instructor controls speed via tethering, much like for the slider above.
TetraSki
The TetraSki is a version of the Snow'Kart for skiers lacking motor skills to steer via handles, but still desiring independent control. The Tetra can be equipped with a joystick or a straw. I only used the Tetra with a joystick during training – it was a blast. It's an incredible piece of equipment enabling a skier with more complex needs to enjoy independence on the slopes.
A Few Tips
Tethering / Bucketing
When tethering and bucketing, short skis are easier to maneuver around equipment. I got away with my 190s for a lot of bucketing and tethering, but occasionally borrowed shorter teaching skis – always easier. When bucketing, you're often in a wide stance with the sit ski between your skis.
For tethering, you'll stay on the inside of your skier's turns. E.g., if you're tethering the skier through wide S-turns, you'll make narrower S-turns – inside and uphill.
Loading / Unloading
For seated equipment, always double-check the loading mechanism. (Unlock the bucket from the ski base, so the bucket can lift and slide onto the chair.)
When first learning to load equipment, ask the attendants for a full stop. It's faster (and safer) than dragging a sit-ski out of the ditch.
Talk to the the chairlift / gondola attendants in advance. Loading protocols vary. E.g., One of JHMR's gondolas has a wheeled, carpeted cart that sit-skis slide onto for loading. Our other gondola has plastic strips laid out over concrete from the ski patrol entrance to the car for the sit-ski to slide in.
In the beginning of the season, attendants (and instructors) are still learning. By the end, lift loading becomes a well-oiled machine.
Sit-Ski Technique
Force yourself to look downhill (e.g., chin on downhill shoulder). Just like regular skiing, when eyes follow the direction of skis, you'll over-exaggerate turns.
Small adjustments can have a big impact on performance, compared to regular skiing. E.g., foam inserts in bucket, tighter straps, stiffer ski or a new sit-ski. Be patient and try changing one thing at a time when troubleshooting.